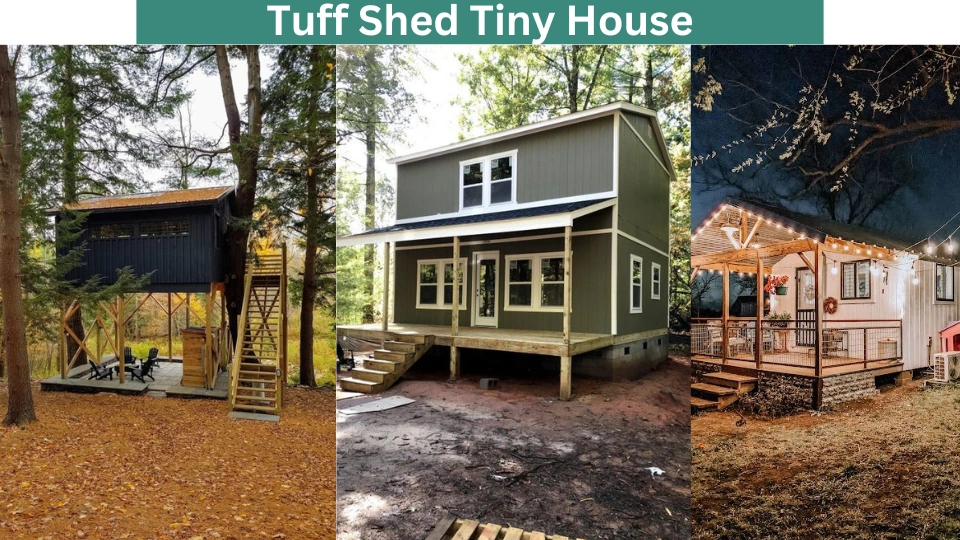
Tuff Shed tiny houses redefine compact living, offering innovative solutions for modern lifestyles. Tuff Shed, a leading company in storage buildings and garages, provides unique solutions to tiny houses.
These small homes are customizable and much cheaper to build than traditional houses. The appeal of tiny living has grown, with more people seeking affordability, environmental friendliness, and mobility.
Despite their small size, tiny houses come in various shapes and sizes. You can use pre-made structures like trailers or have one custom-built to your preferences. Tuff shed prices between $50 to $100.
Moving into a tiny house simplifies your life and reduces your belongings. You’ll avoid the heavy debt of buying a larger home, giving you more freedom to enjoy life. Keep reading to discover how you can make Tuff Shed Tiny House.
How To Make A Tuff Shed Tiny House?
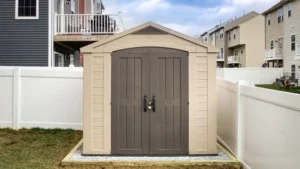
Home Depot sheds may be turned into pleasant homes. Tiny houses have grown in popularity as individuals demand less stuff and debt. Why wouldn’t you want a lovely mobile home?
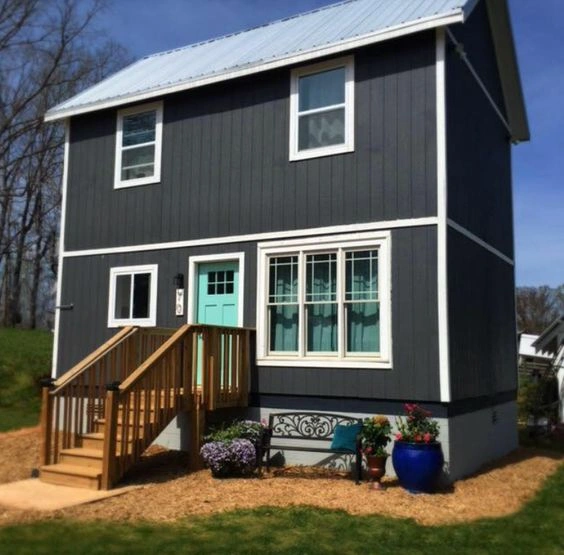
The Sundance TR-1600 is one of Tuff Shed’s most popular tiny models. Customizable shelters start at $13,000.
This Tuff Shed home may be two-story. Add a front porch for chilly morning tea or outdoor entertaining. Spring flowers can be planted in window shutters and boxes.
What’s great about this shed is its versatility. To use as a guide, draw the plan and design before starting.
Take into account the bedroom, kitchen, bathroom, and living space. Find multi-functional furniture online to maximize your space. For sustainability, employ energy-efficient appliances, insulation, and solar panels to avoid the grid.
Tundra Frost, Ground Coffee, and Pumpkin Patch are among Tuff Shed’s 30+ colours. Material and colour options are available for roofing. All sheds include wind and rain warranties to keep you safe. Building a tiny house from a shed is easy, too. Precautions and utilities must be set up before starting. Here are the steps to take.
Make A Level Mat And Drainage Grate
Before the shed’s delivery, removing the grass and spreading four to six inches of 34-inch gravel is advised. Verify that the area is perfectly level, and ensure the gravel base extends b beyond the shed’s footprint in all directions. Using a plate compactor is the way to go for this.
If you want to keep the inspector from asking questions, bury the water and sewer pipes so they aren’t visible. If water flows in a specific way around the shed due to slopes, French drains can be an option to consider.
Connect Utilities
Once the shed has been delivered, the next step is to connect the utilities to it. As soon as the inspector leaves, gather your connections and bring them inside the shed.
Finding and connecting the pre-buried connections would be a tedious task. Before shutting the doors and windows, ensure everything is working correctly.
Because of the complexity of the task, it is best to rely on experts to do the job and ensure all connections are firmly fastened.
Take Care Of Shed Foundation Moisture
Your shed should be constructed on blocks that are just tall enough to allow you to crawl under them. Coat the underside of the shed with an extra layer of oil-based paint on the outdoor deck to protect the wood from moisture.
When constructing a shed, moisture could prove to be your greatest adversary. Lining most sheds with OSB or similar materials does not prevent water from penetrating. Hence, high-quality materials, such as plywood, are required.
If you want to maintain your floor dry and rot-free, you need access and air circulation. The area under the floor where it meets the ground is vulnerable to bugs and moisture buildup.
Adjust Shed Framing
Fixing leaks is the first order of business; you must adapt the shed’s framework. Frames that are smaller than 2×4s are a common choice for shed builders. If it’s within your budget, use 2x4s to construct your shed. This will ensure that all of your components will last.
Since every part of the structure is designed to fit into a 2×4 wall, you might have to get creative in the next few steps if your walls aren’t 2×4. Like some barns, a dwelling with a 1×3 wall will be very cold. Due to this, you should invest in improved insulation.
Connect Power, HAVC, And Water.
The following step is to install the HVAC system, power and water lines, internet connections, and any other necessary infrastructure. Adding outdoor outlets and lighting to the shed is another option to explore.
Because of the space constraints, it is essential to position outlets near your use points. Consider all of your electrical devices before deciding where to put outlets. Be sure to install an outlet immediately if any wall runs are longer than 5 feet.
Please do not skimp on outlets; they are affordable (a box costs $1.50, and the receptacle costs $2).
Finally Close All Of The Gaps
Fill any cracks or holes in your tiny house’s floor or walls to make it airtight. An excellent silicone caulk is all you need. Also, if there are any hard-to-reach places, you can spray foam there.
Unsealed cracks in flooring and walls provide easy access for pests. Also, these holes are potential entry points for rain and light, which can damage your sheds. Start sealing from the outside and work your way inside.
Also, caulk the corners where the framing meets the sheathing and the joints where the walls meet the floor. Although it may seem excessive, thoroughly sealing a shed takes many hours due to its diminutive size.
Insulate The Walls And Ceilings
Insulation batts and spray foam are your two main choices. Insulation made of batts is dependable, inexpensive, and simple to set up. Another excellent option for insulation is closed-cell spray foam. An outstanding air and vapour barrier is closed-cell spray foam.
To cut down on cutting, you can get batts that are precisely the correct size for the holes in your walls. Another option is spray foam, which can maintain a constant temperature inside a home for a more extended period with the same thickness as the wall. Spray foam also has a very high R-value.
Wrap The Shed’s Floors In Insulation
Your shed floor will condense and get chilly if no insulation is underneath. This can be easily avoided by putting fresh plywood on top of the foam board already on the shed floor or by adding insulation beneath the floor.
Or, you could decide to do both. Order a taller walled shed, spray the underside with closed cell foam, lay down two inches of polyiso foam, and then cover that with a thick plywood subfloor using the appropriate adhesives.
It looks strange where it transitions next to your front entrance, so you’ll have to figure that out. Foam on the sides also limits overhead height, so use a taller wall option for your shed. Heated flooring can be an excellent addition, and both problems are solvable.
Finishing Touches
The last step is to apply the final touches after you have finished all the other steps for Tuff Shed Tiny House. Now is the time to put in the finishing touches, such as cabinets, countertops, and more. Use the store’s widely available, prefabricated goods to make things easier and cheaper.
Ikea or your neighbourhood big box retailer has fantastic options. Install illumination in the rough-in areas, bring in your appliances, etc. So that’s the rundown. A shed has been transformed into a cosy home thanks to your ingenuity.
How To Create a Minimalistic Layout?
Now that you’ve decided to build your tiny home in a shed plan your floor layout. Inside and exterior, your Tuff Shed house is customized. Your plan can be an open-concept living and dining room on the main floor with a bathroom and bedroom upstairs. The choice is yours.
After you sort the layout, let’s work out how to fit your current home’s contents into 800 square feet. Never thought you’d be a minimalist? Unfortunately, living in a tiny house requires a lot of decluttering.
Keep things simple. Choose furniture with simple lines and a few decorations. Reflect on your achievements. This may reveal items that no longer fit your new home and lifestyle.
Choose your most crucial items to steer your purge. Remove trash and useless items first. Address your biggest fears. Tackle your house’s problems to enhance your confidence.
Tuff Shed Conversion Ideas
The exciting part, decorating, can begin after you’ve mastered the nuts and bolts. That extends beyond the realm of floor and wall colours. Striking a balance between making your home stylish and functional is challenging. Consider these suggestions for converting your Tuff Shed Tiny House.
· Use Designs With Two Functions
Given limited space, household items need to serve multiple purposes. Creative utilization of space is critical. Beginning with a bed, whether a pull-out or concealed in another room, is typically a wise choice.
With a pull-out couch, the shed may double as a guest bedroom in addition to its many other uses.
· Lighting Should Be Considered.
Strategically place mirrors and lights to make the most of a limited space. Using large mirrors can help you make the most of your space by reflecting light from all directions. You can employ them to assess your stunning appearance in your cramped dwelling.
When dealing with natural light, this becomes quite important. Make the most of natural light sources wherever possible, especially in smaller homes with smaller windows.
· Pay Attention To How It Looks
Enhance your home’s aesthetic with a standout element, such as a vibrant rug or striking lighting fixture, creating a cohesive look. Every item should serve a purpose in your limited space, marrying functionality with beauty. While your style may include numerous smaller items, be cautious not to overcrowd your tiny house, maintaining a sense of spaciousness and visual appeal.
· Take Storage Savvy Measures
Due to the lack of floor space, storage is paramount in small dwellings. Therefore, you need to be creative when using all your storage space.
Use the staircase as a bookcase if your property has a second level. Consequently, it serves as a staircase and the focal point of the basement chamber, which contains ample storage space.
If you want to know their locations without sacrificing the home’s curb appeal, consider working them into the design.
· Utilize The Walls
Utilizing a light or neutral colour palette for your walls and floors can enhance the brightness of your space. You can create a focal point that visually expands the room by opting for a bold statement piece.
Additionally, consider maximizing wall space by incorporating shelves for storage and displaying decor. Hanging artwork adds aesthetic appeal and personalizes your living area. With numerous design possibilities for your Tuff Shed tiny home, there’s no better time to start.
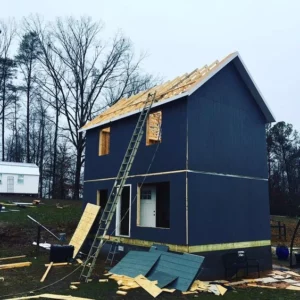
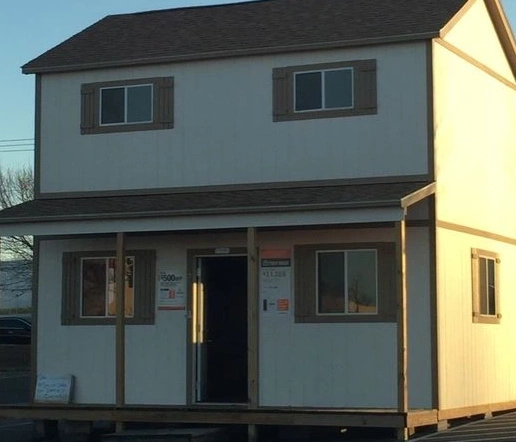
2-Story Tuff Shed Home Depot
The two-story home depot tuff shed tiny house offers a versatile solution for additional living space or storage. With sturdy construction and customizable options, it provides ample room for various needs.
Its durable materials ensure longevity and resilience against the elements. Whether used as a cozy home office, guest house, or workshop, this Tuff Shed model delivers functionality and practicality for any homeowner seeking extra space.
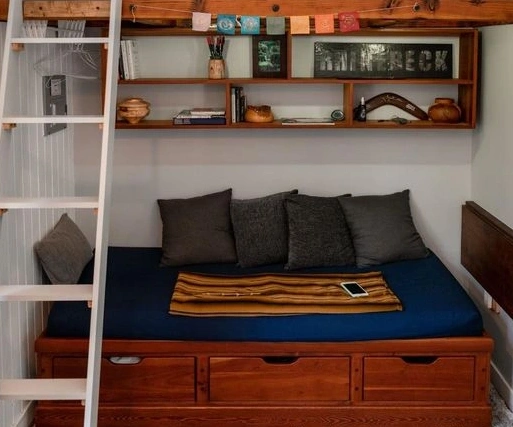
Tuff Shed Tiny House Interior
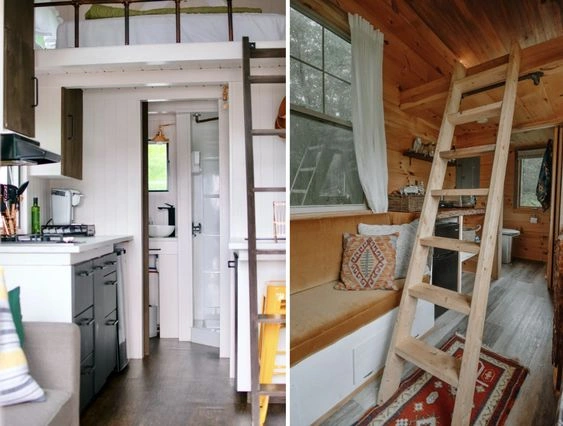
The interior of a Tuff Shed tiny house offers cozy functionality with smart design features. Utilizing every inch efficiently, it boasts a versatile layout that maximizes space. Natural light floods through carefully positioned windows, enhancing the sense of openness.
The interior is customizable to suit individual preferences, with options for various finishes, fixtures, and storage solutions.
Thoughtful touches like built-in shelving and multipurpose furniture optimize functionality without sacrificing style. Whether it’s a quaint living space or a minimalist retreat, Tuff Shed’s tiny house interiors are designed to inspire comfort and efficiency in compact living.
Tuff Shed Tiny House Conversion
Converting a Tuff Shed into a tiny house involves transforming a durable storage shed into a livable space. With careful planning and customization, the shed’s interior can be modified to include essential amenities like insulation, electricity, and plumbing.
From cozy sleeping lofts to compact kitchens and bathrooms, the possibilities for customization are endless. Tuff Shed’s sturdy construction provides a solid foundation for creating a comfortable and functional tiny home that suits various lifestyle needs.
Frequently Asked Questions
Can A Tuff Shed Be Used As A Home?
Buildings sold as Tuff Sheds are not intended to be used as permanent, full-time dwellings, nor are they built to be utilized in such a capacity. In addition, the use of sheds as dwelling places may be prohibited by applicable local building codes or other legislation.
How Much Weight Can A Tuff Shed Hold?
When the joists are set directly onto concrete or some other hard, homogeneous surface, the weight per square foot is 75 pounds; however, when the joists are placed on concrete levelling blocks, the weight per square foot is 50 pounds. To increase the weight capability, more floor joists might be installed.
Can You Add A Bathroom To A Tuff Shed?
You should always verify with your HOA or local permitting office prior to any construction on your property. However, in many cases, adding a bathroom to a Tuff Shed or similar structure is typically permissible.
How Much Does A 10×12 Tuff Shed Weigh?
A 10×12 Tuff Shed typically weighs between 1,800 to 2,200 pounds, depending on the specific model, features, and materials used in its construction.